Domain Page: Custom Domain Setup
Introduction
The Domain Setup page allows resellers to configure a custom domain for their instance of the ESP application. Resellers can either use a generated subdomain in the format manage.system73.com or set up their own custom domain. Below is a step-by-step guide to complete the setup.
Add Domain Step
To begin the process of connecting a domain on the platform, go to the Domain Setup section within the ESP application, under the Custom Branding tab. You will see a three-step flow, which must be completed sequentially to move on to the next step. Below we explain what to do in each step.
1. Register Your Domain
Enter your domain name in the provided text field. It must be a valid domain to proceed to the next step.
⚠️ Note: A valid domain should only contain lowercase letters, numbers, dots, and hyphens.
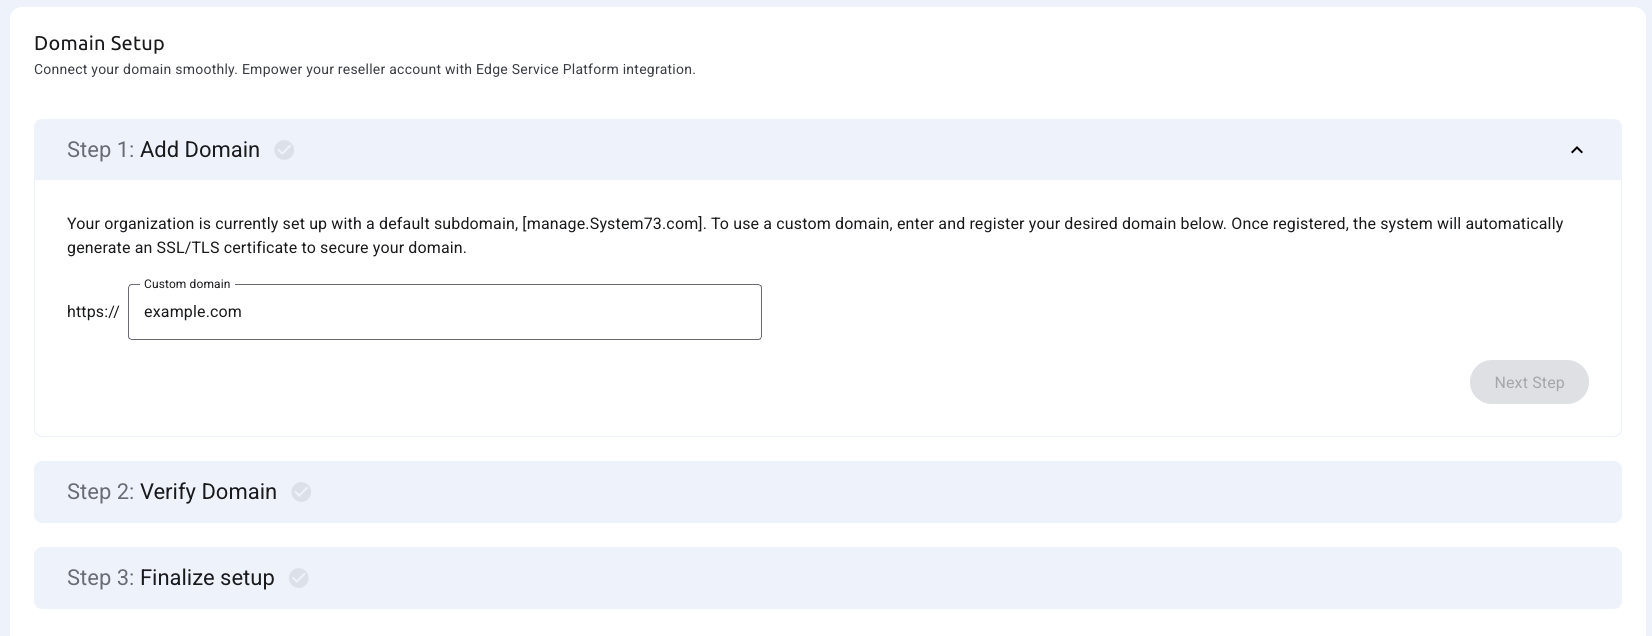
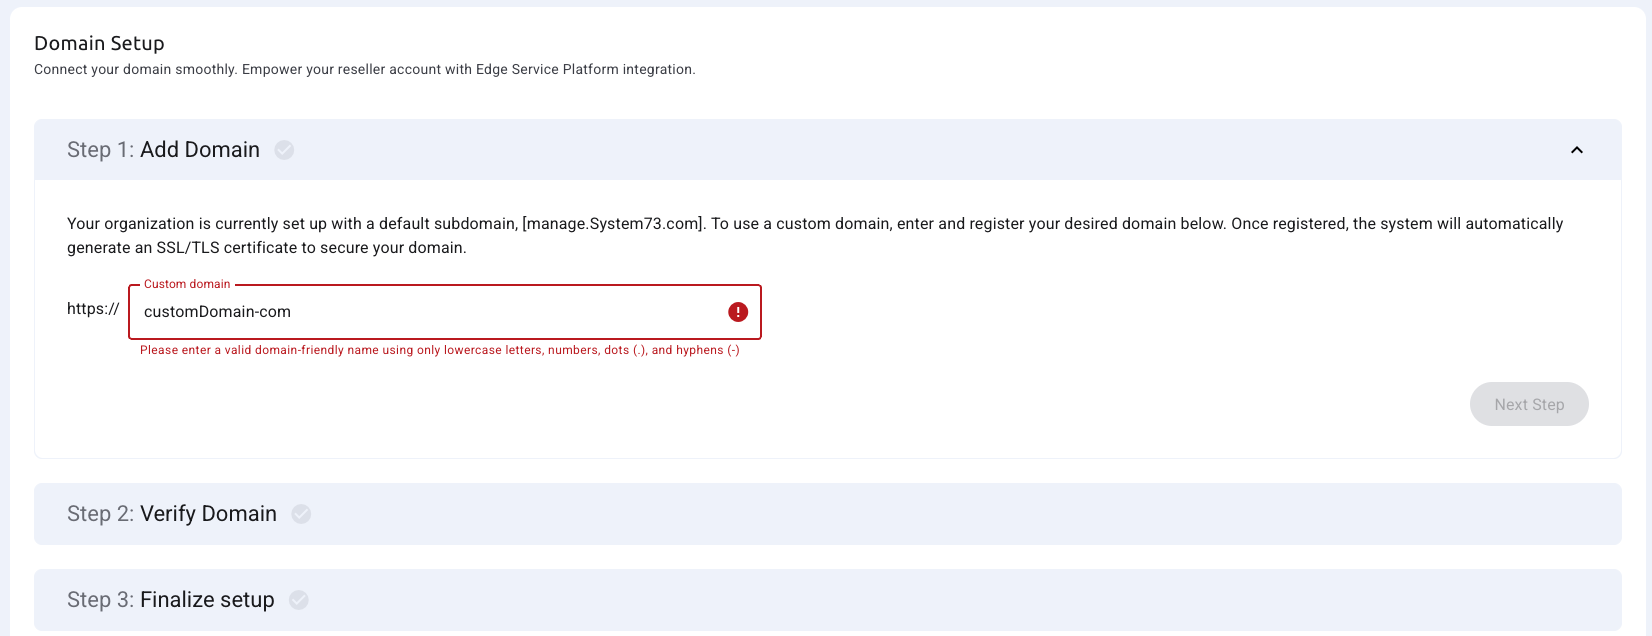
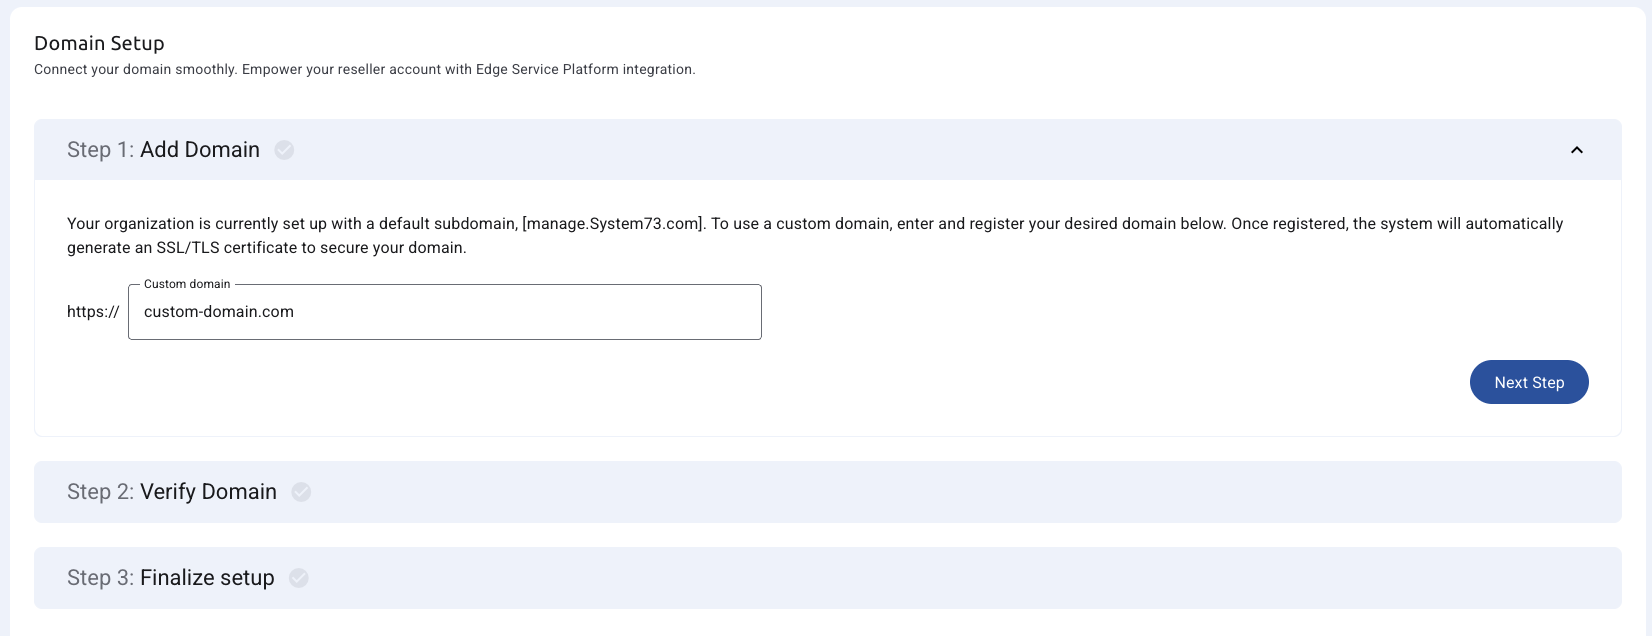
Once a syntactically valid domain is entered and there are no validation errors, the "Next Step" button becomes enabled. When the user clicks this button, the system attempts to create the necessary certificate records in Amazon and in our database. At this point, two outcomes are possible:
- ✅ If the process succeeds, the "Next Step" button will be activated, and the flow continues to Step 2.
- ❌ If a CAA record error occurs, the process fails, an error message is shown, and the "Next Step" button remains disabled until a new valid domain is entered.
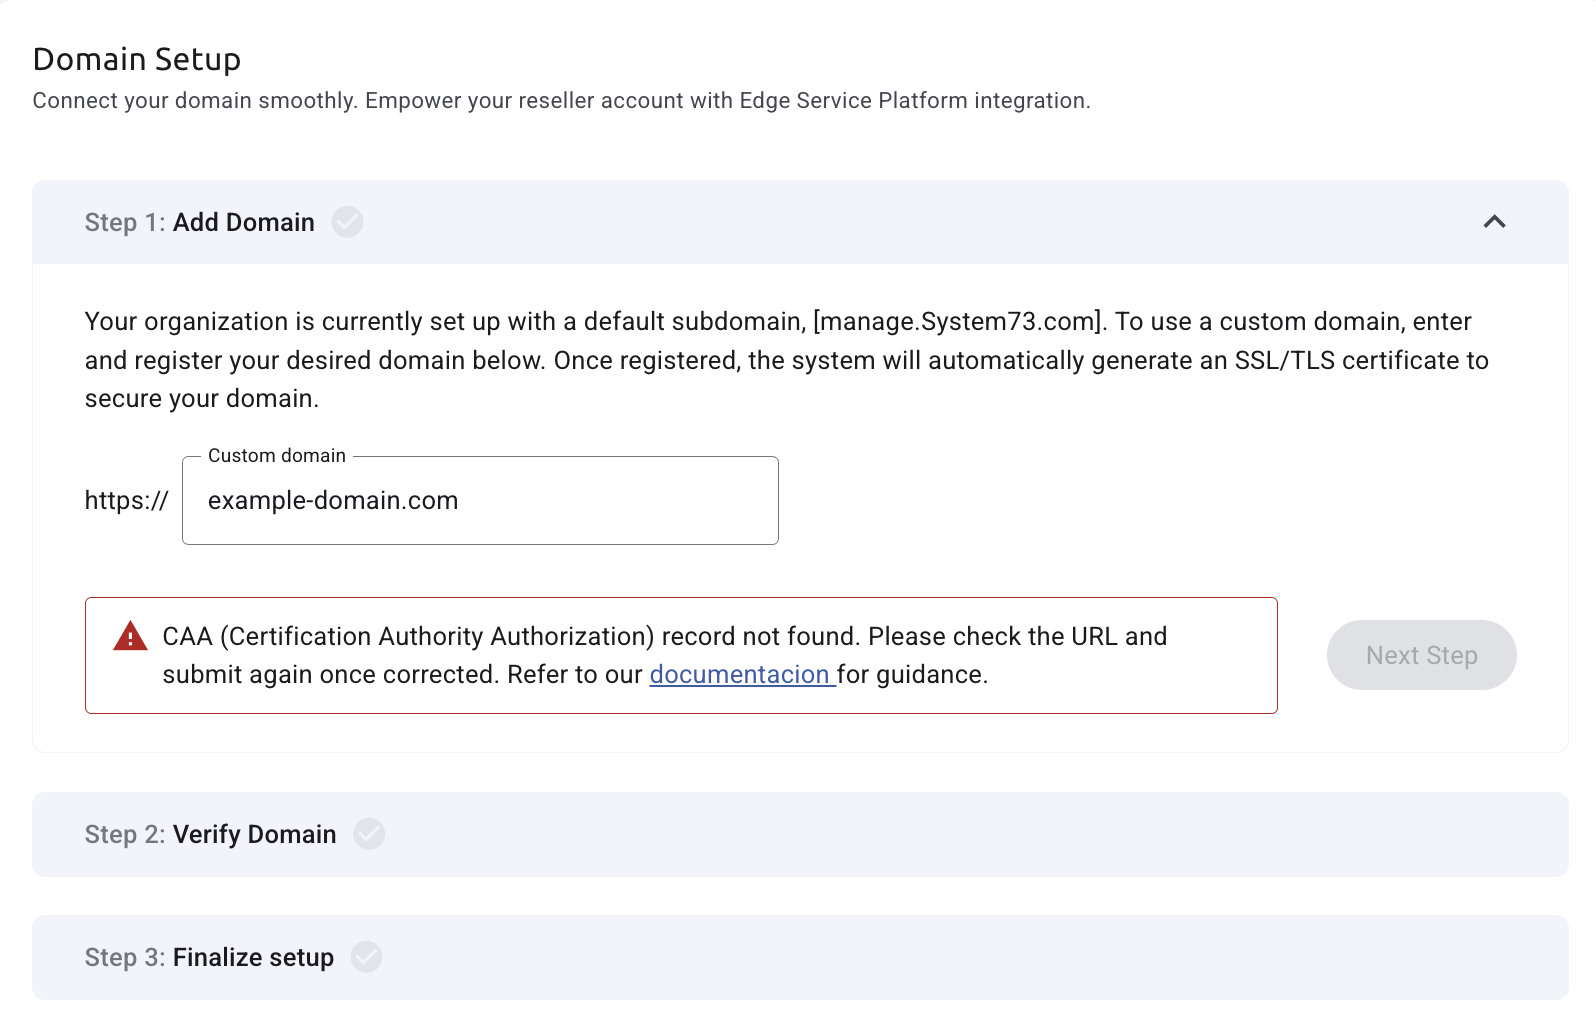
Additional Validation Error: CAA Record
In some cases, even if the domain format is valid, you may encounter an error during the domain registration step due to CAA (Certification Authority Authorization) record restrictions.
A CAA record is a DNS entry that specifies which Certificate Authorities (CAs) are allowed to issue certificates for a given domain. If your domain has a CAA record that does not authorize Amazon (used by System73) to issue certificates, the process will fail and you will not be able to proceed to the next step. To resolve this you can:
-
Use a different domain.
-
Or, update your DNS provider’s CAA record to explicitly allow Amazon to issue certificates (this typically requires access to the DNS configuration and technical knowledge).
2. Verify Domain
System73 will generate an SSL/TLS certificate for your custom domain and display the required fields:
-
CNAME Name
-
CNAME Value
These values must be added to your DNS provider in order to validate the certificate and enable the next step.
How to Configure the CNAME Record
Example provided by System73:
-
CNAME Name: custom-domain.com
-
CNAME Value: randomstring.system73.net
To configure it, follow these general steps (may vary slightly depending on your DNS provider):
-
Log in to your DNS provider (e.g., GoDaddy, Google Domains, Cloudflare).
-
Go to the DNS settings or Zone Editor.
-
Click on Add Record.
-
Select CNAME as the record type.
-
In the Name / Host field, enter the CNAME Name.
-
In the Value / Points to field, enter the CNAME Value.
-
Save the record.
Once the CNAME is added, System73 will automatically attempt to validate the certificate. You can refresh the page to check for updated validation status.
Certificate Statuses
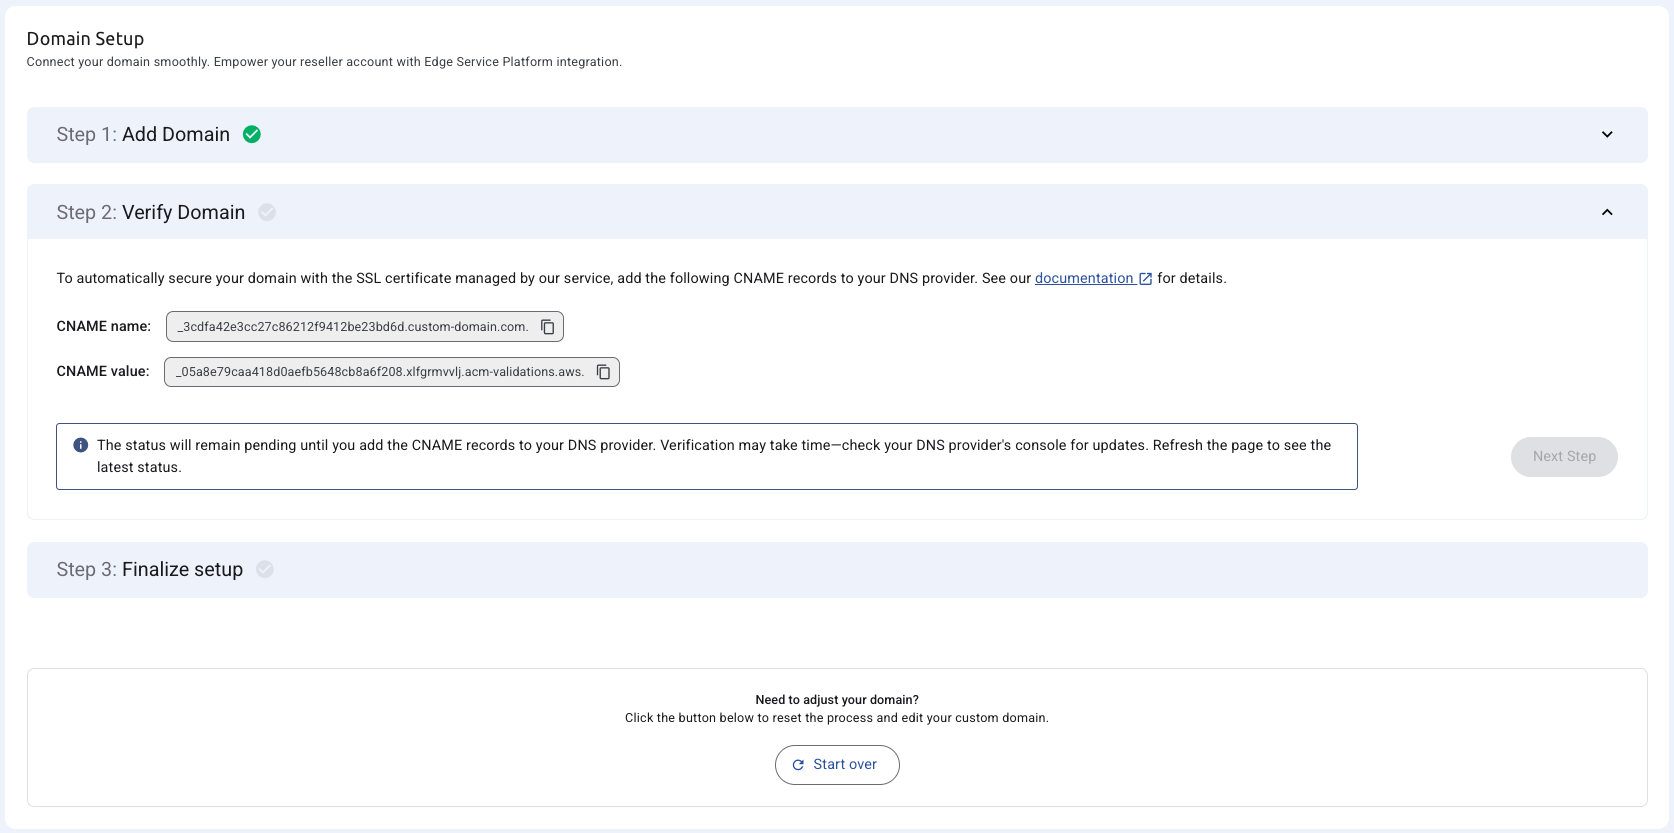
- ⏳ Pending: Initial state while the certificate is being validated. The "Next Step" button is disabled.
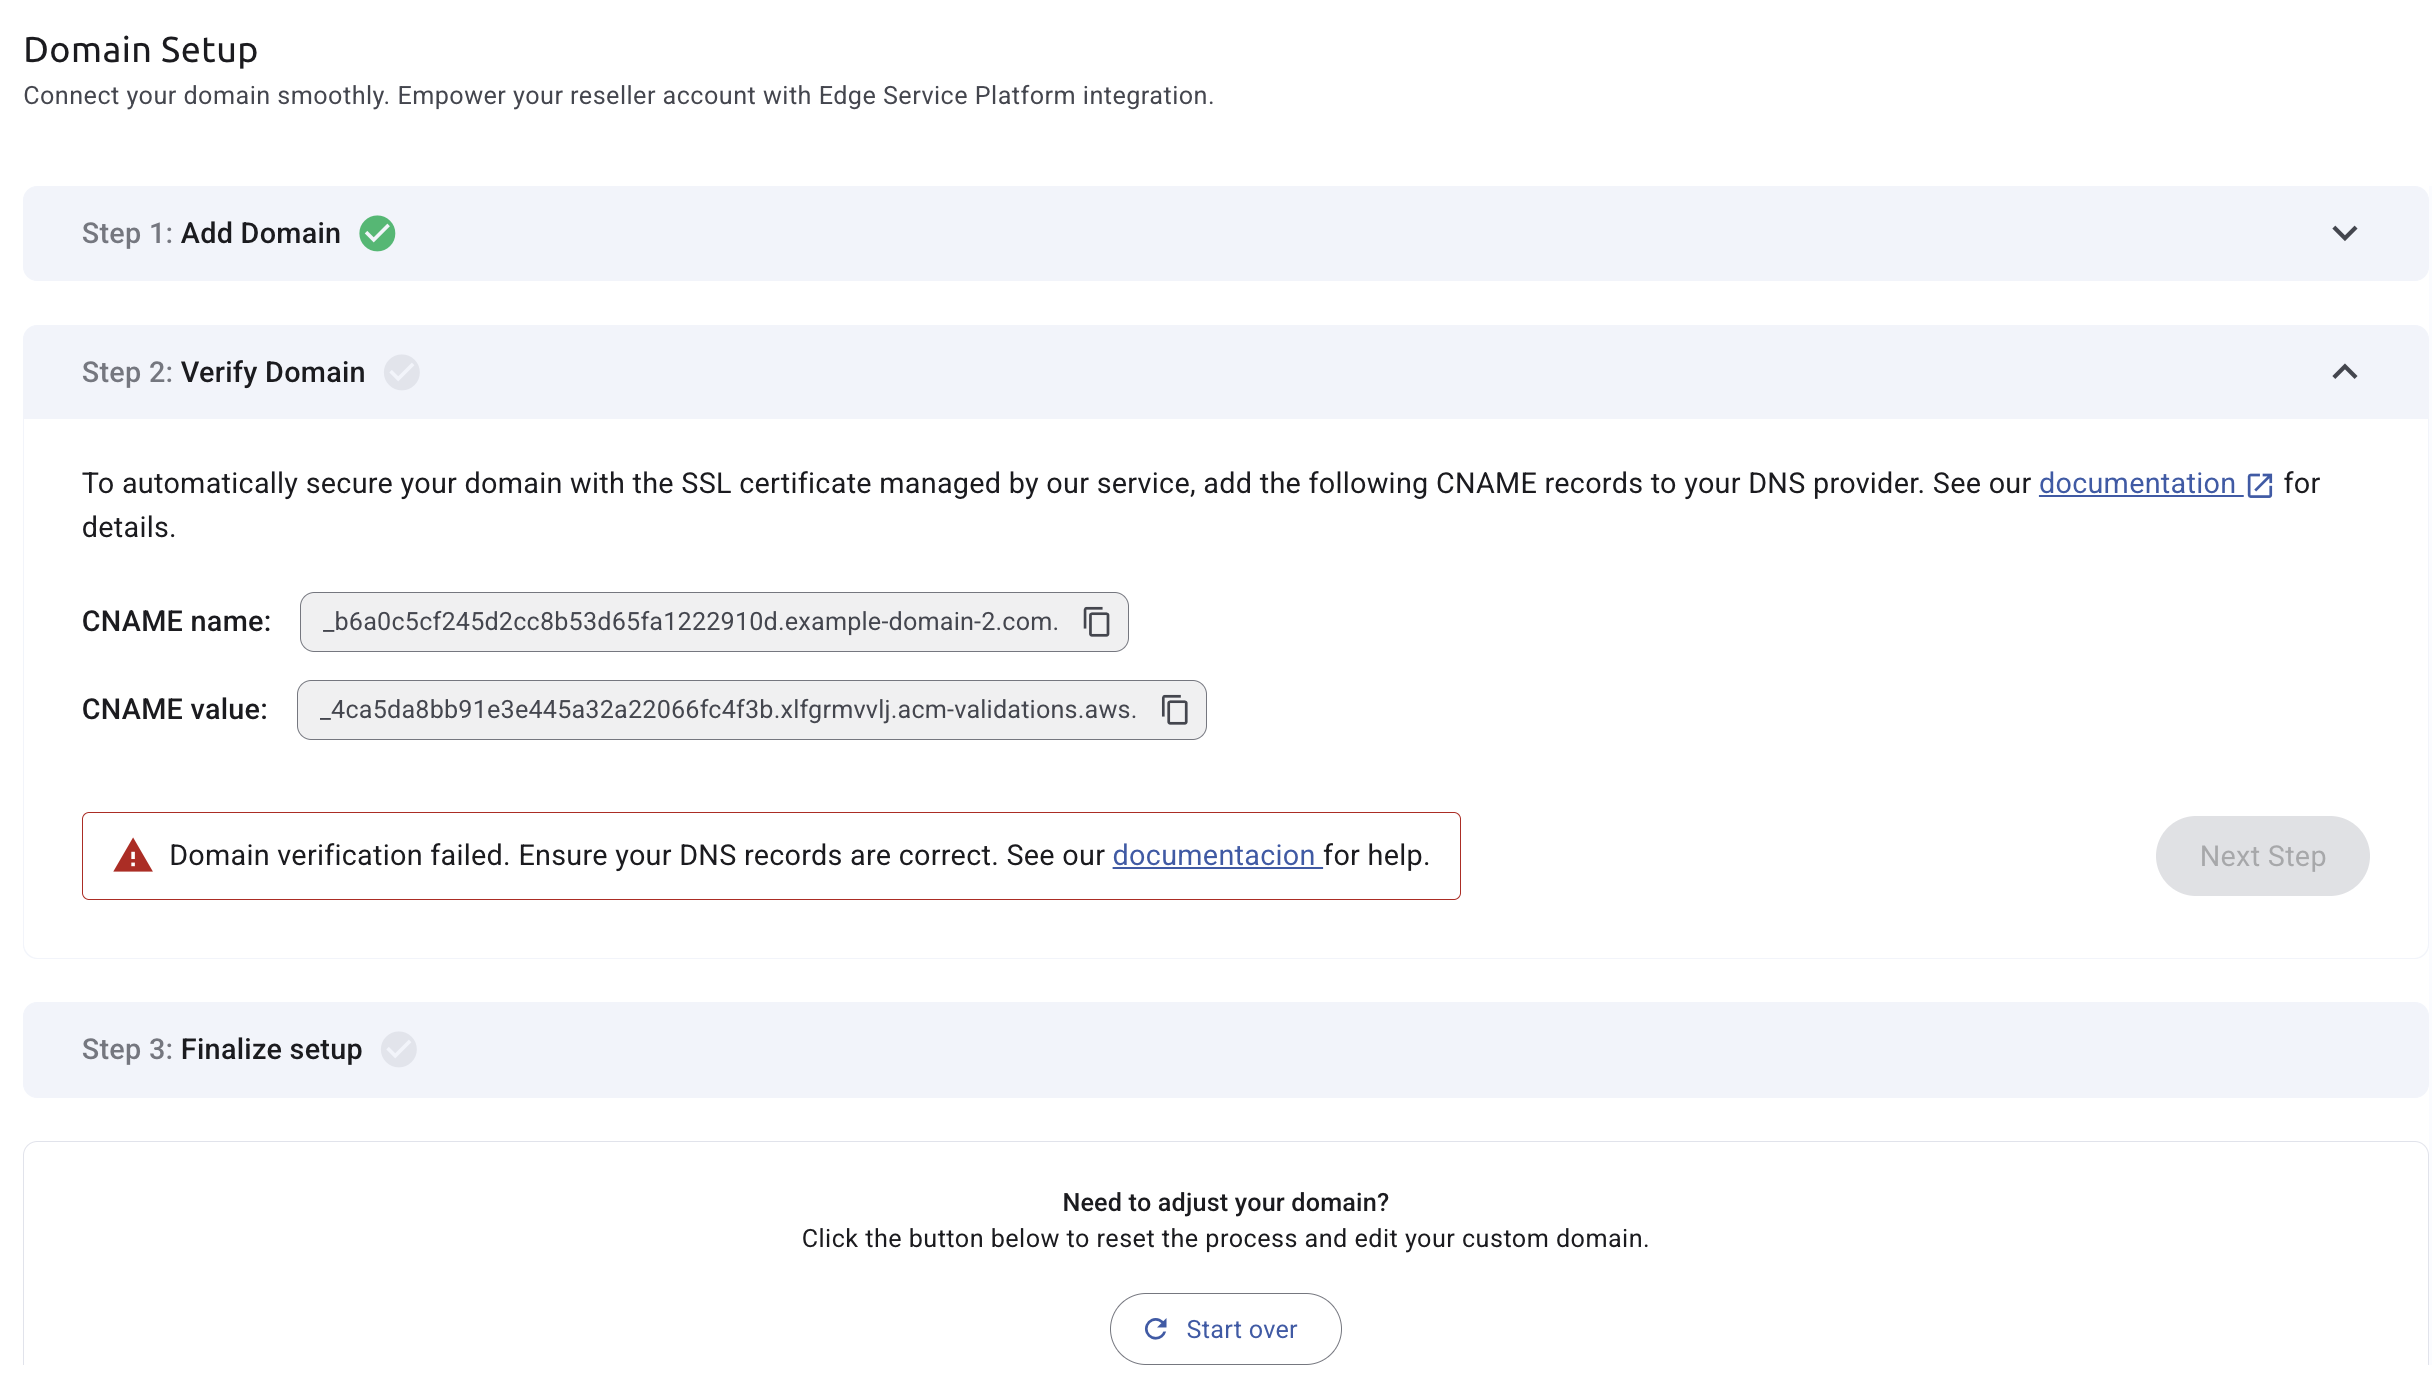
- ❌ Error: Something went wrong during validation. The "Next Step" button remains disabled.
Possible errors when creating the SSL certificate
SSL certificate creation with AWS ACM uses CNAME DNS validation. If validation fails, common causes include:
| Reason | Description |
|---|---|
| Missing CNAME record | You didn’t add the required DNS record provided by ACM. |
| Incorrect CNAME value | The name or value in the DNS record does not match with what ACM expects. |
| DNS propagation delay | You added the record, but it hasn’t fully propagated globally yet. |
| Wrong domain or subdomain | You created the certificate for a different domain than where the record was added. |
| CNAME record was removed | The record was deleted before validation completed. |
| Validation timeout | ACM waits up to 72 hours. If not validated in time, the request expires. |
| DNS is managed externally | If using an external DNS provider, ensure you added the record there, not in Route53. |
| Domain is behind a firewall or private zone | ACM can’t validate domains that aren't publicly accessible. |
| Wildcard certificate misconfiguration | Certificate created for .example.com but used for example.com* (apex domain), or vice versa. |
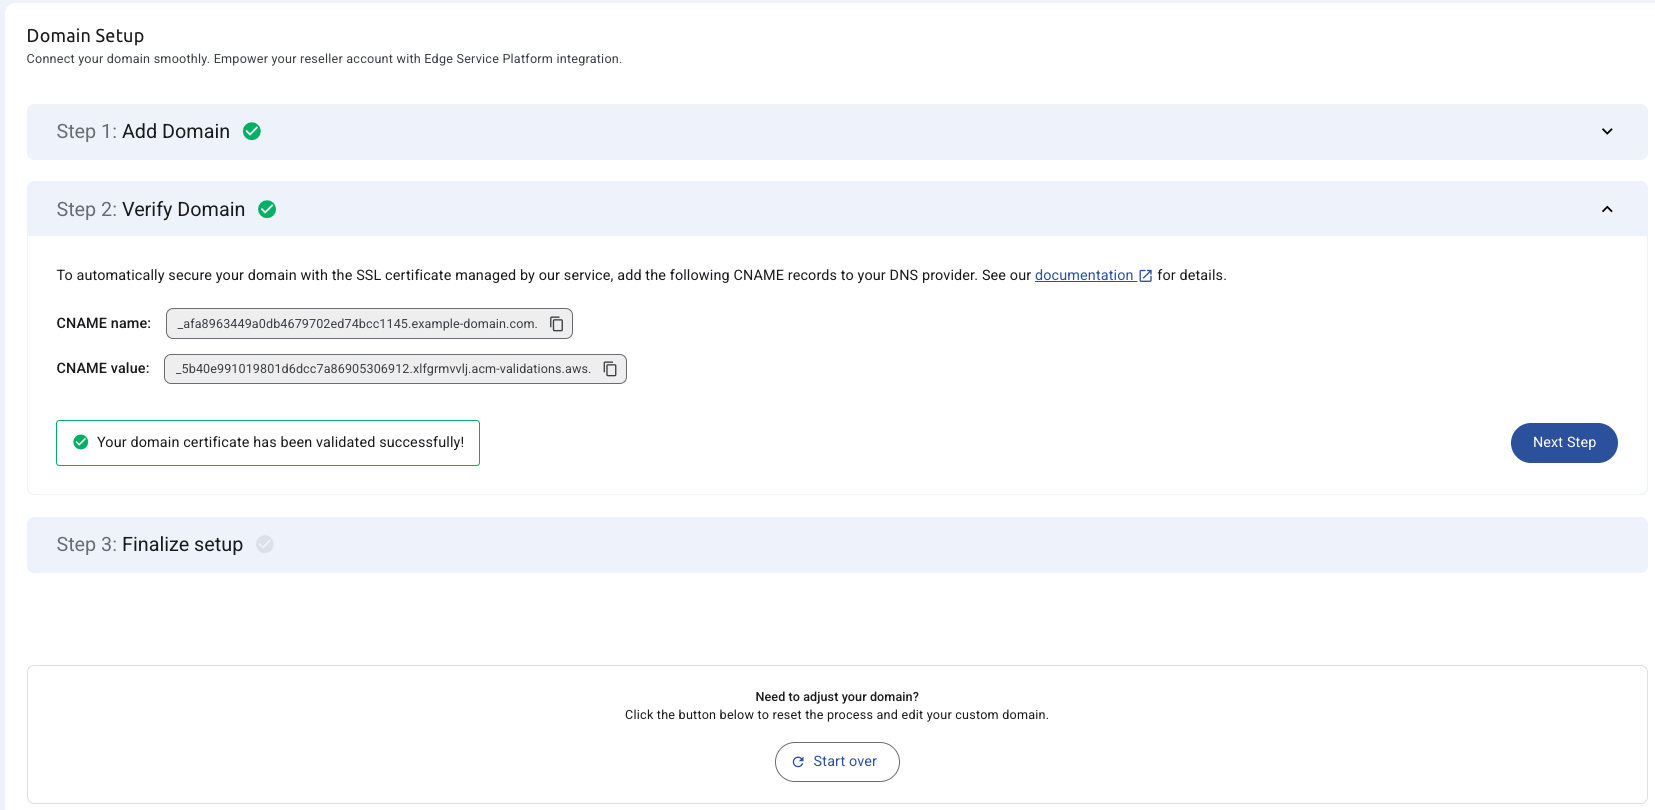
- ✅ Success: The certificate has been successfully validated. The "Next Step" button is enabled.
From this step, you can go back to the previous one to check the entered domain.
⚠️ Note: Once the domain is entered and verified it cannot be edited. To set up a new domain you will need to start the process from the very beginning by pressing on “Start Over” button.
2.1 Create CloudFront Distribution (Automated Process)
When you click "Next Step" after successful certificate validation, the system automatically calls the backend to create a CloudFront distribution for your domain using the validated SSL certificate.
Possible Outcomes:
✅ Success - The process continues automatically to Step 3 where you'll configure DNS records.
❌ Errors
| Message Error | Cause | Recommended Action |
|---|---|---|
| "Please try again after a few minutes." | Previous CloudFront distribution is still being deleted | Wait 5-10 minutes before retrying |
| "Delete existing DNS records and retry." | Existing CloudFront configuration detected in DNS | Remove old CNAME records then retry |
| "Please try again or start over." | Unexpected issue (e.g., AWS API limits) | Retry or contact support if persistent |
3. Finalize Setup
Once the CloudFront distribution is successfully created, a final CNAME record will be displayed. This record includes:
- Your custom domain (e.g.,
www.custom-domain.com) - A CloudFront address (e.g.,
d2ot07zv65b9uc.cloudfront.net)
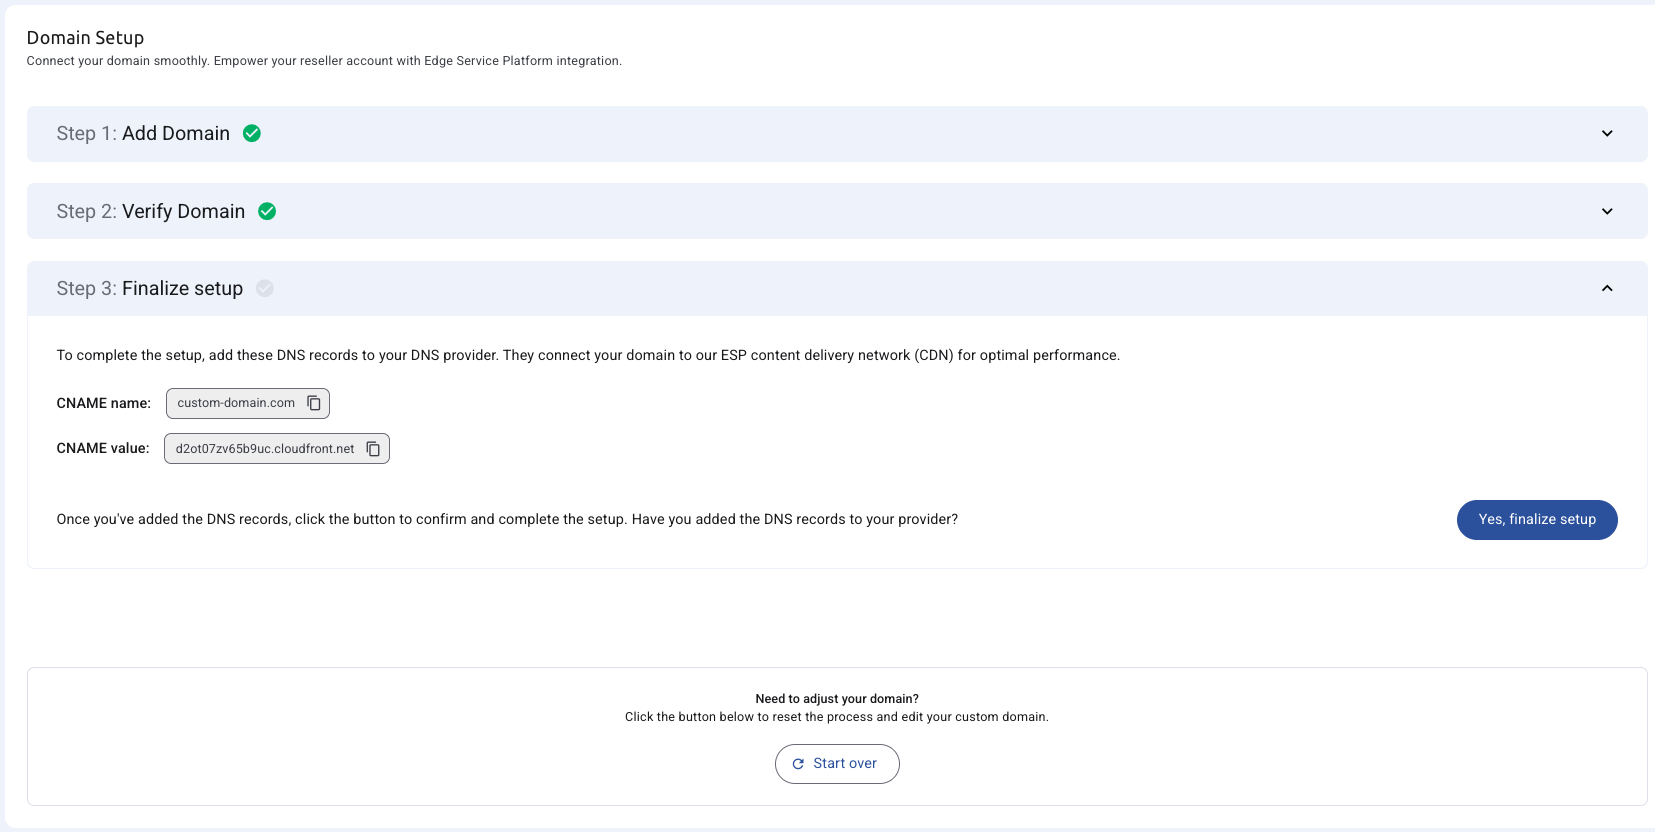
You should copy this CNAME record and configure it with your DNS provider. After this step is completed, your domain will be fully configured, and ressellers will be able to access the application through your custom domain.
When ready, click the "Yes, finalize setup" button, which will take you to a screen with a summary of the completed configuration.
4. Success Page (Setup Confirmation)
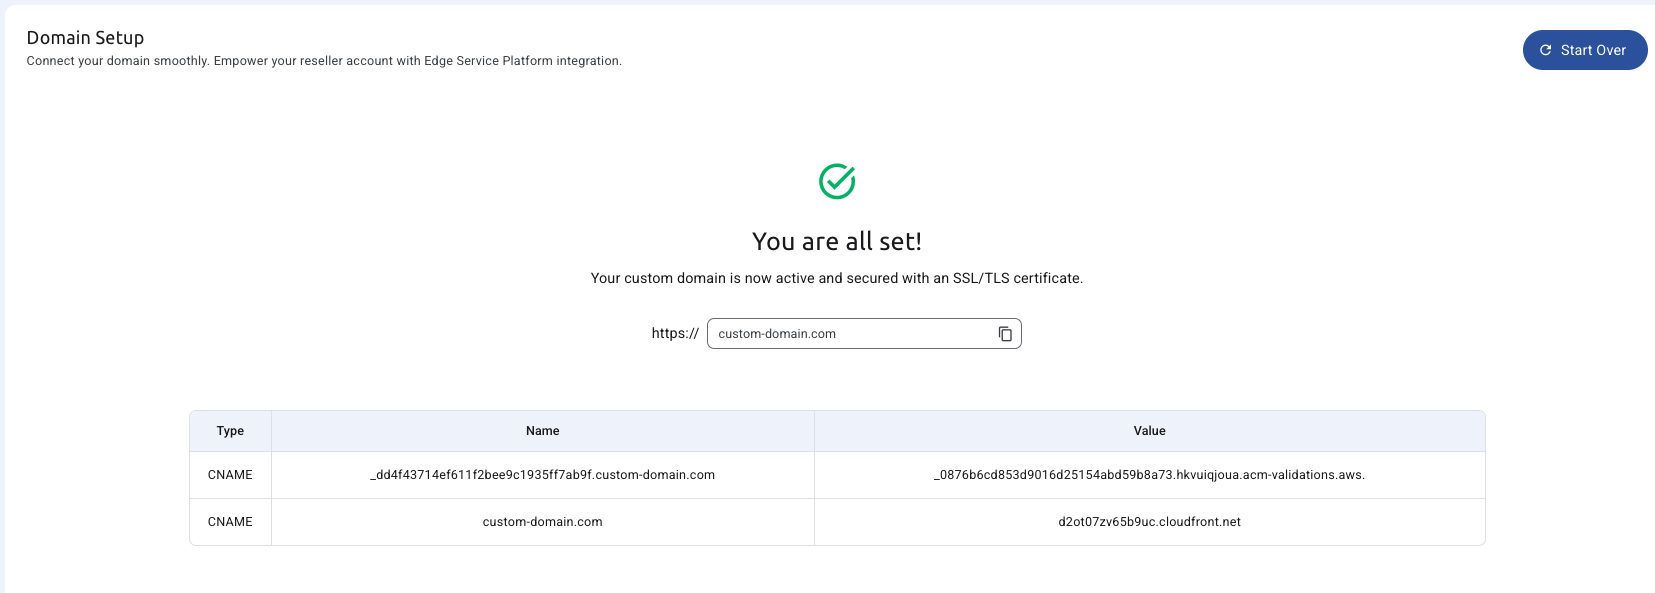
The final screen displays a table with a summary of the configured CNAME records. From here, you will also have the option to return to the initial state by clicking the "Start Over" button.
Differences in Mobile Mode
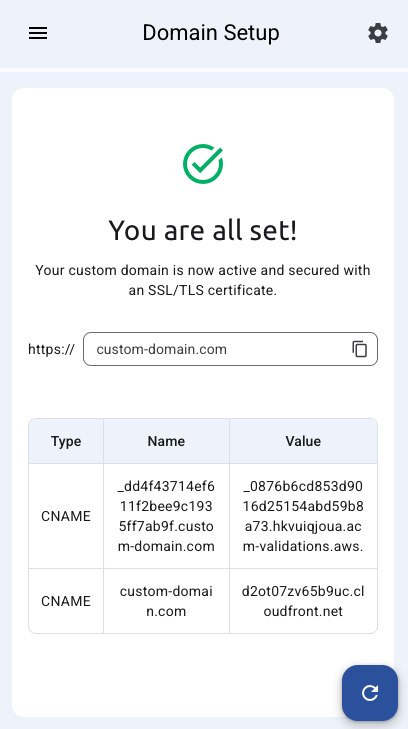
The mobile version of the Domain Setup flow maintains the same structure and functionality as the desktop version, with one minor visual difference:
- On the Success Page (Setup Confirmation), the "Start Over" button is displayed at the bottom of the screen instead of the top. Additionally, it includes an icon to enhance accessibility and visibility on smaller screens.
This change ensures better usability and alignment with mobile design standards, while preserving all existing functionality.
This section was last updated 2025-08-25